
Installing Stick Up Cam Pro for Solar Use
Install your Stick Up Cam Pro, Solar using this step-by-step process.
Quick Start
1. Download and open the Ring app.
2. Select Set Up a Device.
3. Scan QR code with the Ring app.
Hardware included
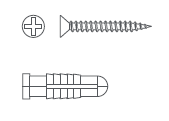
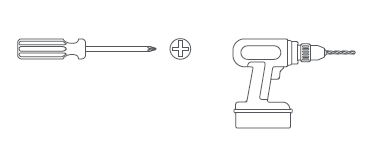
Tools needed
Remove protective film from device. This ensures your device works properly.
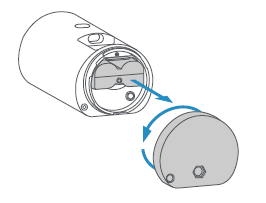
Remove the battery.
Twist the battery compartment counterclockwise to unlock and remove the cover. Then, remove the battery and discard the orange battery insulator.
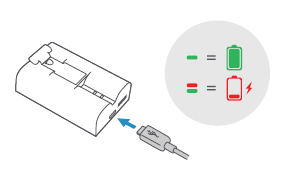
Charge the battery.
Plug it into a power source using the provided USB cable. Once the battery’s fully charged, only one light on top will glow green.
Re-insert the battery.
Slide the battery back into the camera until it clicks into place. Twist the battery compartment cover clockwise to lock it and tighten the security screw.
Choose a location with the view you want.
Your camera can be mounted on an outdoor wall, eave, or overhang.
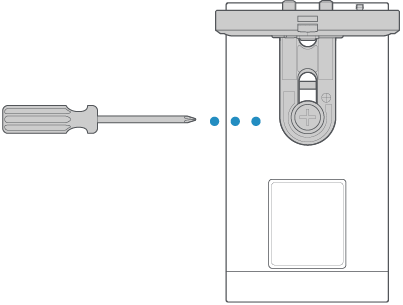
Wall installation
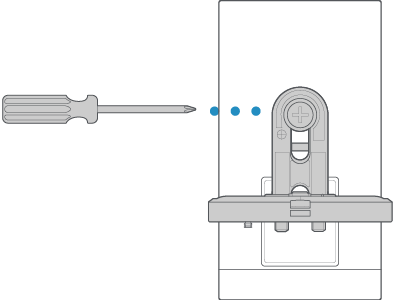
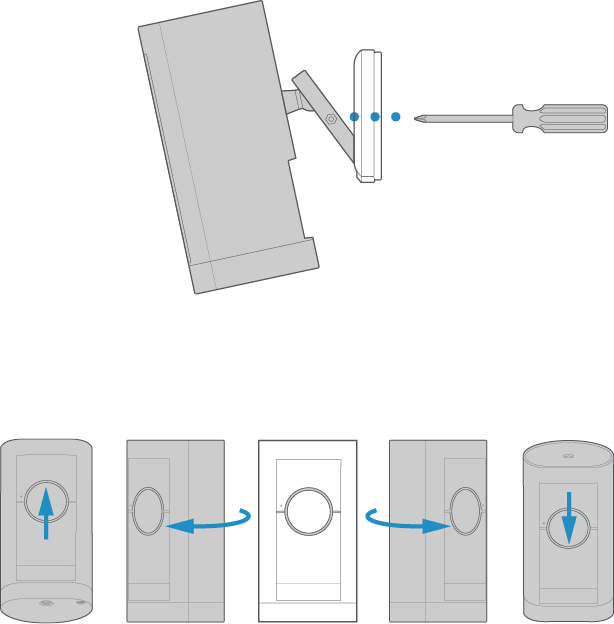
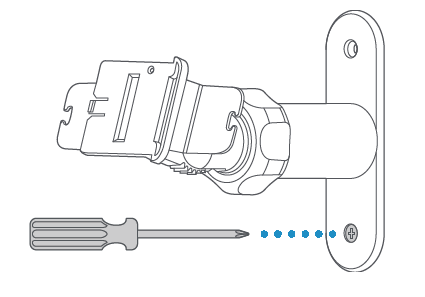
Remove the decorative cover from the camera mount.

Use a standard Phillips-head screwdriver (not included) to unscrew the mount and detach it from the rest of the camera.
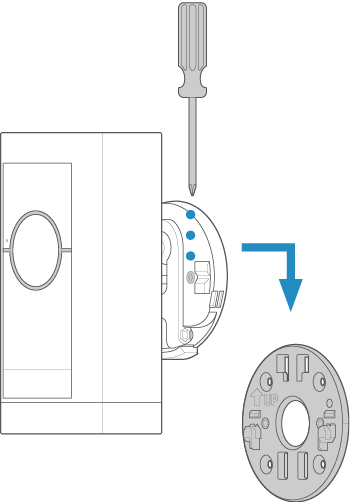
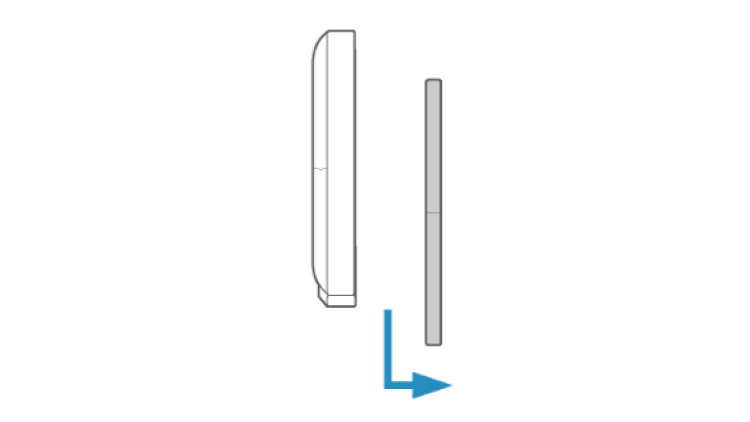
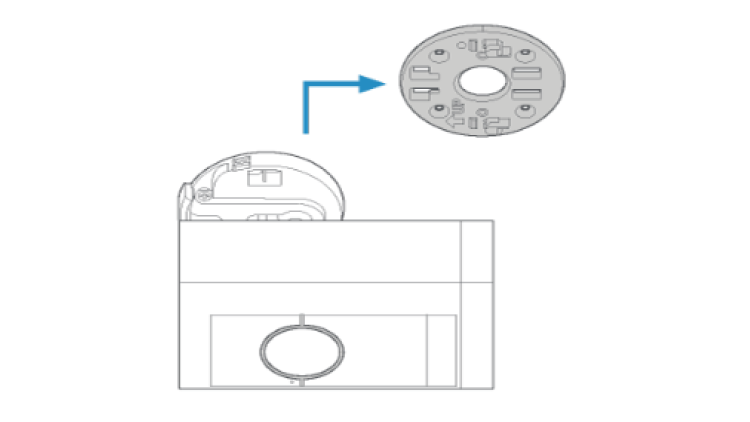
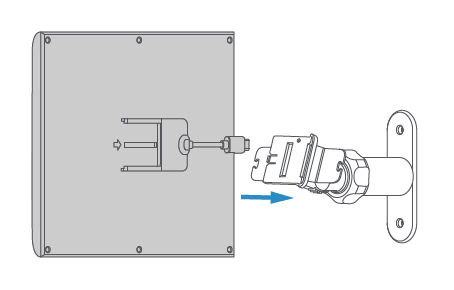
Install the mounting plate.
Slide the mounting plate off of the camera mount.

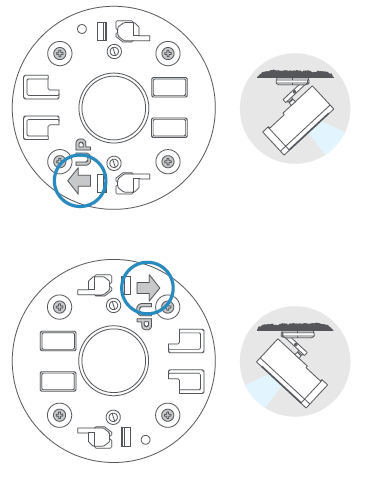
Place the mounting plate on the wall with the UP arrow pointing up.
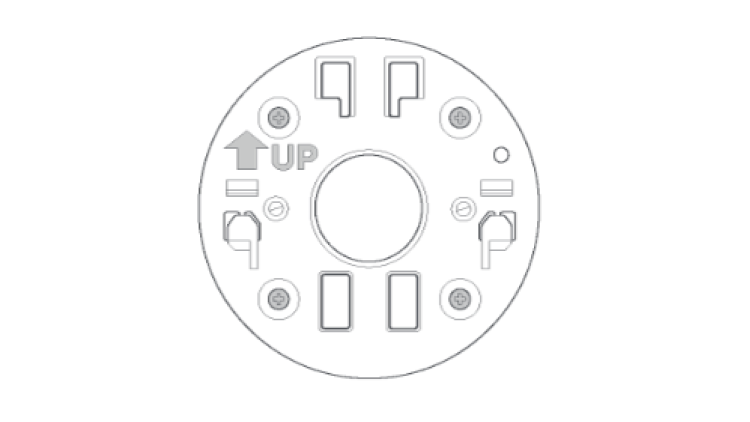
If installing on a wood surface, screw the plate directly into the wall.
If installing on a masonry surface, mark four screw holes using the plate as a guide.
Drill pilot holes using a 1/4" drill bit. Insert the included wall anchors, then drive the four mounting screws through the mounting plate into the wall anchors.

WARNING! Only use the included mounting screws when securing the mounting plate.
CAUTION! DO NOT drill into your home’s electrical wiring.
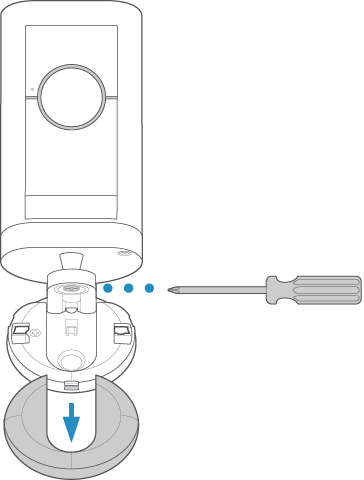
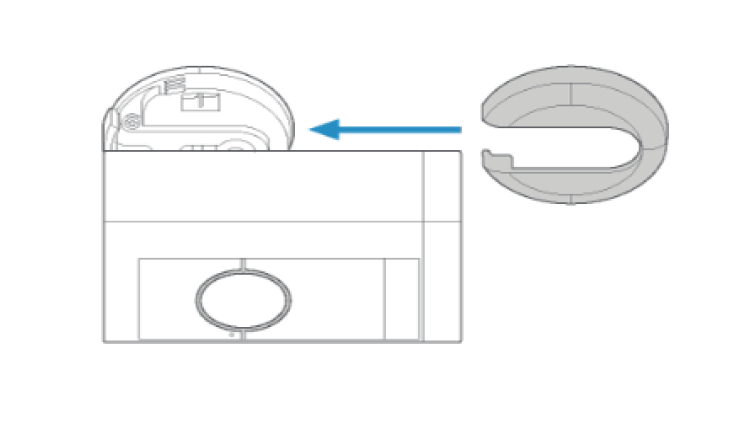
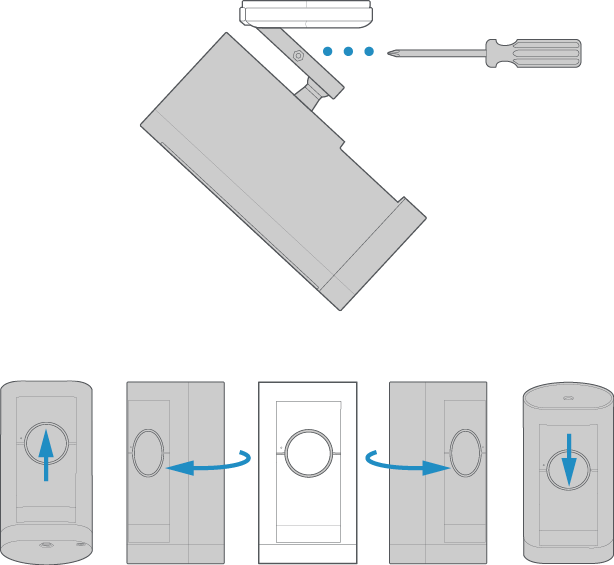
Mount your camera to the wall.
Screw the mount onto the back of the camera.
Slide the camera with its mount onto the mounting plate.
Tighten the security screw on the camera mount so that it’s firmly attached to the mounting plate.
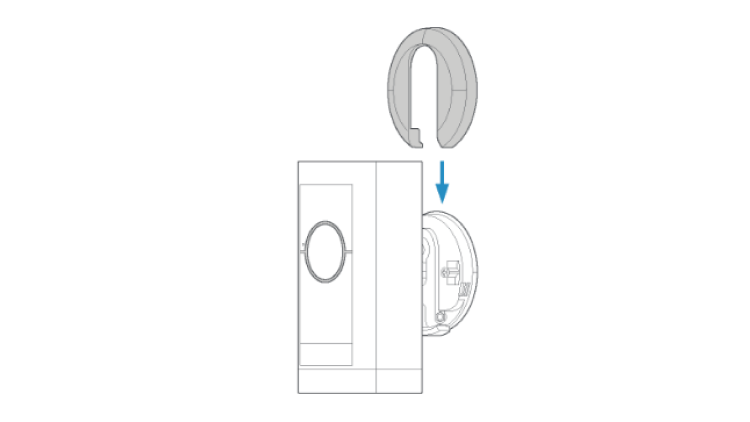
Slide the decorative cover back onto the camera mount and click it into place.
Adjust the camera angle.
Rotate the camera to focus on the area of your choice. Look at Live View in the Ring app to make sure it’s positioned at your desired angle.
Eave or overhang installation
Remove the decorative cover from the camera mount.
Use a standard Phillips-head screwdriver (not included) to unscrew the mount and detach it from the rest of the camera.
Install the mounting plate.
Slide the mounting plate off of the camera mount.
Place the mounting plate on the eave or overhang with the UP arrow pointing in the opposite direction from where your camera will face.
If installing on a wood surface, screw the plate directly into the eave or overhang.
If installing on a masonry surface, mark four screw holes using the plate as a guide.
Drill pilot holes using a 1/4" drill bit. Insert the included wall anchors, then drive the four mounting screws through the mounting plate into the wall anchors.
WARNING! Only use the included mounting screws when securing the mounting plate.
CAUTION! DO NOT drill into your home’s electrical wiring.
Mount your camera to the eave or overhang.
Screw the mount onto the back of the camera. Align the mount arm with the top of the camera.
Slide the camera with its mount onto the mounting plate.
Tighten the security screw on the camera mount so that it’s firmly attached to the mounting plate. Slide the decorative cover back onto the camera mount and click it into place.
Adjust the camera angle.
Rotate the camera to focus on the area of your choice. Look at Live View in the Ring app to make sure it’s positioned at your desired angle.
How to install your Solar Panel (USB-C)
Choose an install location with the most direct sunlight.
If you are in the Northern Hemisphere, direct your Solar Panel towards the south. If you are in the Southern Hemisphere, direct your Solar Panel towards the north.
Make sure there is nothing blocking sunlight from your Solar Panel.
Hardware included
- Mounting screws
- Mounting anchors
- Cable clips
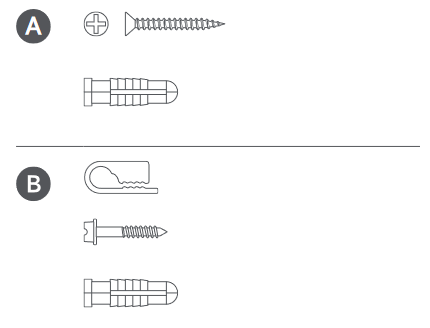
Tools needed
- Phillips-head screwdriver
- Drill (optional)
Screw the bracket to the wall.
If mounting to brick, concrete or stucco, use wall anchors and 6mm drill.
Slide the Solar Panel onto the bracket until it clicks into place.
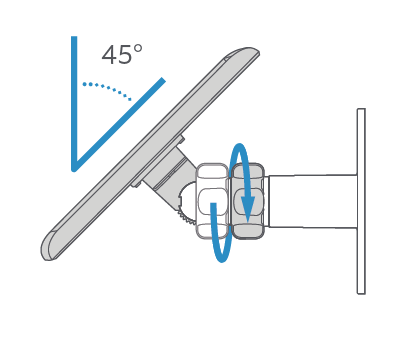
Loosen the adjustment nut and adjust the positioning as required.
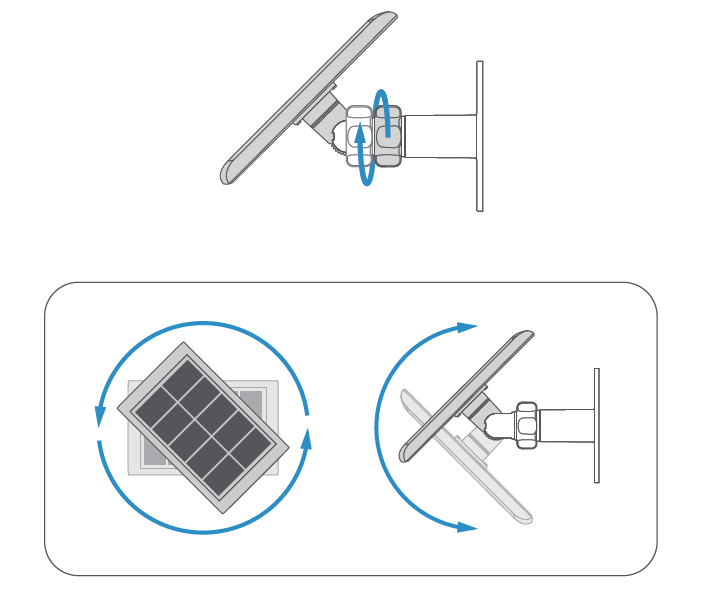
Tighten the adjustment nut when positioned.
We recommend that the Solar Panel is at a 45 degree angle facing the sun.
Wrap any spare cable round the cable holder, and clip the cable into one of the cable stops.
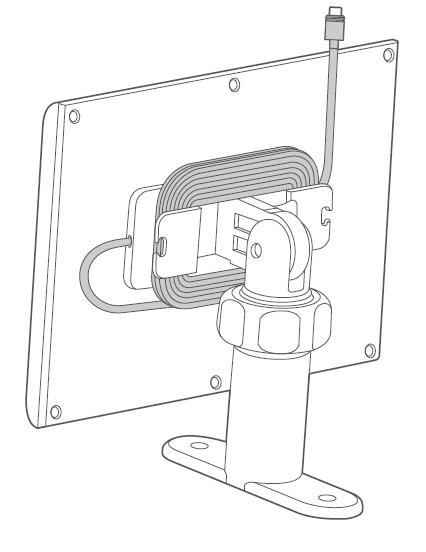
Connect your Solar Panel to your Stick Up Cam Pro, using the USB-C cable.
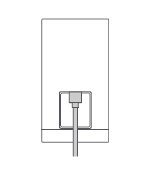
Use the cable clips to secure the cable in place.
